Blog

  • Star Wars inspired Mini- Galaxy Cakes

    Star Wars inspired Mini- Galaxy Cakes

    adapted by Zaida Marrero from ATK Mirror Cake and featured on the Podcast Episode #2

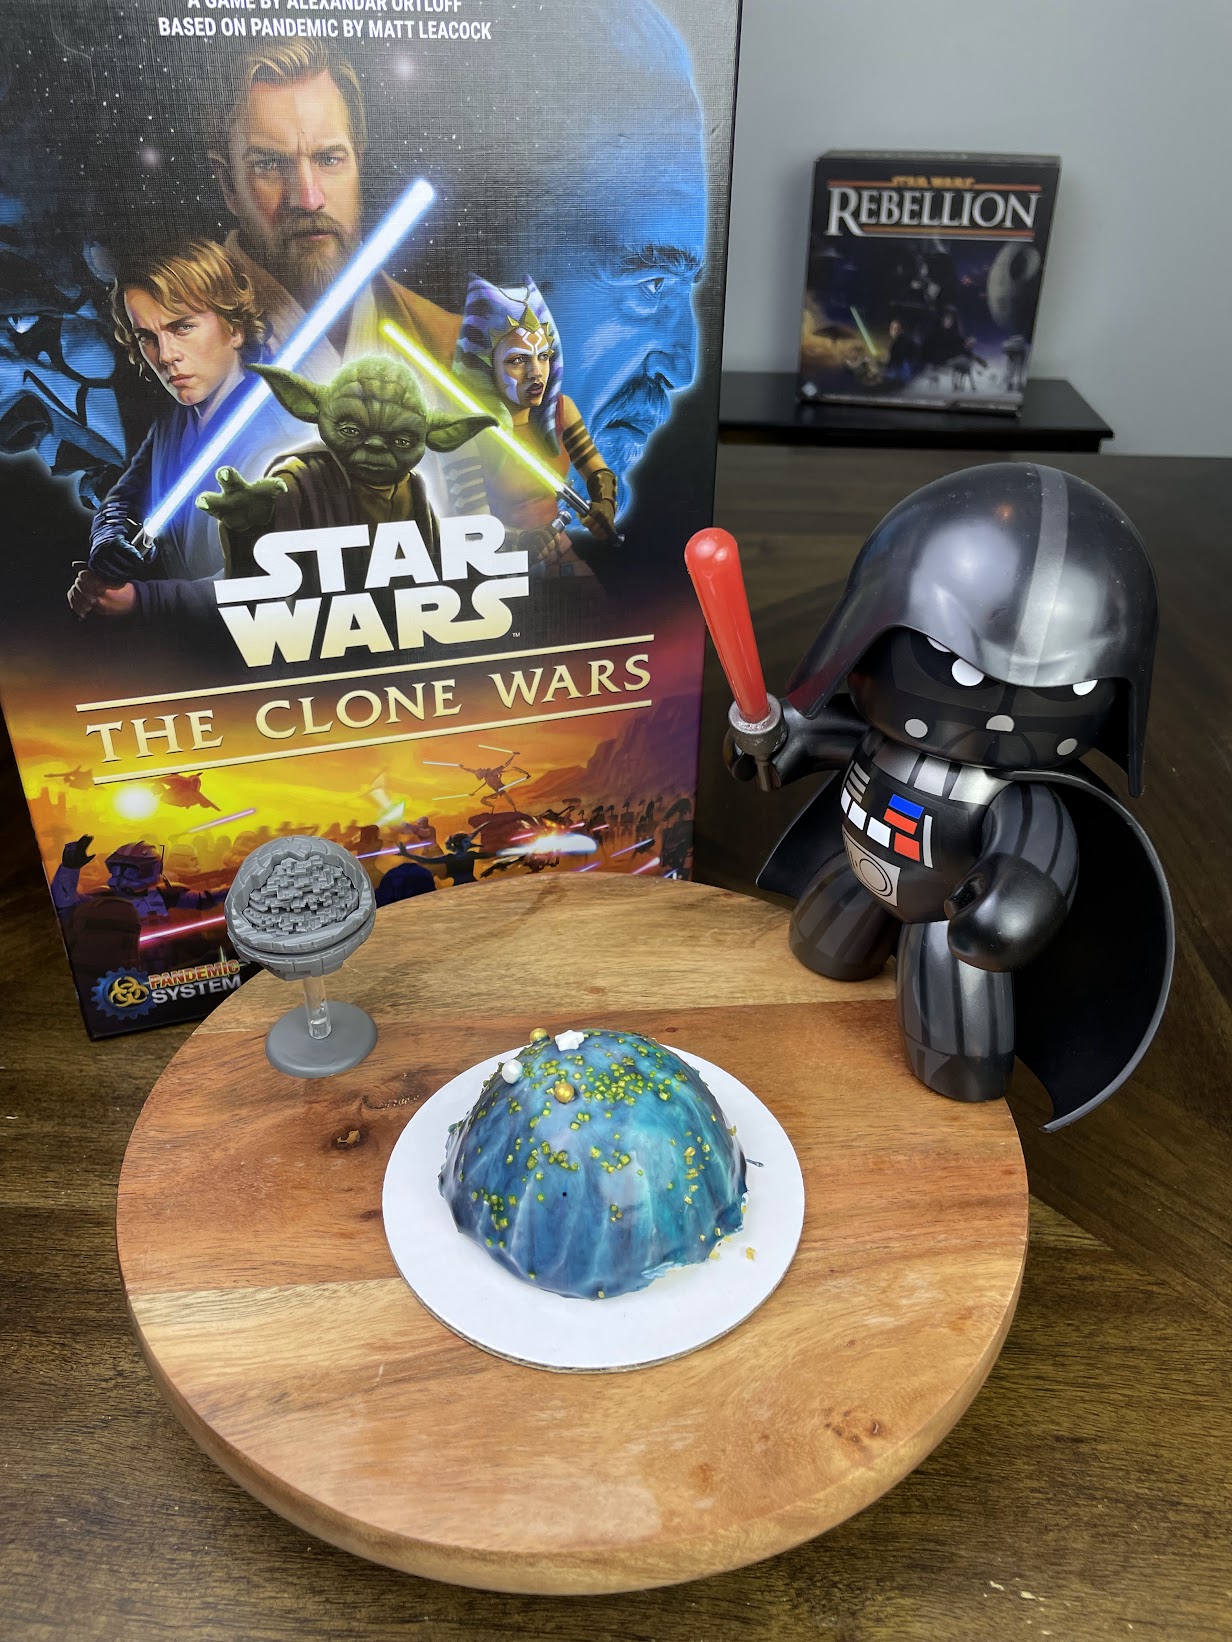
    I got inspired by the actual “board” of Star Wars: The Clone Wars board game. The board shows a collection of planets from Star Wars galaxy. I decided to bake miniature cakes that will resemble a hemisphere of a planet protruding from the board. The dark and the light sides of the force are also integrated in the flavors of the cake. A dark chocolate cake represents the the dark side of the force and a white chocolate buttercream and glaze represent the light side of the force. As a little detail, these mini planets have chocolate ganache centers that, while optional, will surprise your guests with a delicious planet core.

    Mini Galaxy Cake

    Here’s how to make this galactic dessert perfect for the upcoming May 4th or any Star Wars related activity.

    You will need:

    • Semi sphere, oven safe, silicone mold
    • Your favorite cake recipe or store-bought cake mix. I made Ultimate Chocolate Cupcakes recipe from ATK.
    • Your favorite frosting recipe or store-bought frosting. I made White Chocolate Swiss buttercream.
    • 2 oz bittersweet chocolate (I use Ghirardelli*)
    • 1/4 cup heavy cream
    • 1 tbsp confection sugar *
    • 2 tbsp unflavored gelatin
    • 3/4 cup of water
    • 3/4 cup granulated sugar
    • 1/2 cup sweetened condensed milk
    • 1 tbsp vanilla extract
    • 1 1/2 cup of white chocolate
    • gel food coloring in different colors. I used pink, black, turquoise and purple
    • baking tray with wire rack
    • fine-mesh strainer

    Instructions:

    1. For the ganache centers: Place bittersweet chocolate, cream, and confectioners’ sugar in medium microwave-safe bowl. Heat in microwave on high power until mixture is warm to touch, 20 to 30 seconds. Whisk until smooth; transfer bowl to refrigerator for 20 mins.
    2. For the cakes: Prepare cake batter according to your recipe or box mix instructions. Place the silicone molds on top of a baking sheet to help moving the silicone molds in and out the oven easier. Fill the semi-spheres of the mold with cake batter. Gently place dollops (about 1 tsp) of chocolate ganache in the center of each cake. Bake cakes according to recipe and rotate half way through baking. Since these are small cakes check doneness in 18-20 mins. Use the force and you’ll know when they are ready! Also, you can insert a toothpick in the center of a cake and if it comes out clean, the cakes are ready. Let the cakes cool in molds for 10 mins, then transfer to the wire rack and let cool for 1 hour.
    3. For the frosting: Prepare frosting batch according to your recipe or do nothing if you are using store-bought frosting.
    4. To frost: Spread frosting throughout each cake with a small spatula. Place wire rack inside baking sheet, and you can place a piece of parchment paper between the baking sheet and wire rack to help with cleanup. Place frosted cakes on wire rack and place the baking sheet with cakes in freezer while making glaze or in refrigerator for a longer period of time.
    5. For the gelatin glaze: In small bowl, use spoon to stir together gelatin and ¼ cup water. Let sit for 5 minutes.
    6. In small saucepan, combine sugar, sweetened condensed milk, vanilla, and remaining ½ cup water. Cook sugar mixture over medium heat, stirring occasionally with rubber spatula, until mixture starts to bubble around edges, 5 to 8 minutes. Turn off heat and slide saucepan to cool burner.
    7. Scrape gelatin mixture into sugar mixture. Stir until gelatin is dissolved. Add white chocolate chips and stir until melted and mixture is smooth, about 1 minute.
    8. Place fine-mesh strainer in medium bowl. Pour chocolate mixture through strainer; discard solids. Let glaze cool for 15 minutes, stirring occasionally.
    9. Pour ½ cup glaze into liquid measuring cup. Pour another ½ cup glaze into second liquid measuring cup. Add gel food coloring to each glaze and combine in bowl according to your preferences.
    10. Remove cakes from freezer/refrigerator. Working quickly, pour glaze over top of chilled cakes.
    11. Let cakes sit for 5 minutes, allowing extra glaze to drip off cake. Slide spatula under cakes and carefully lift glazed cakes. Transfer glazed cakes to serving platter and place in refrigerator to chill until glaze is set and no longer sticky, about 20 minutes.
    12. Remove cakes from refrigerator and let sit at room temperature for at least 30 minutes or up to 24 hours before serving.
  • Podcast Episode #1: John Company

    Podcast Episode #1: John Company

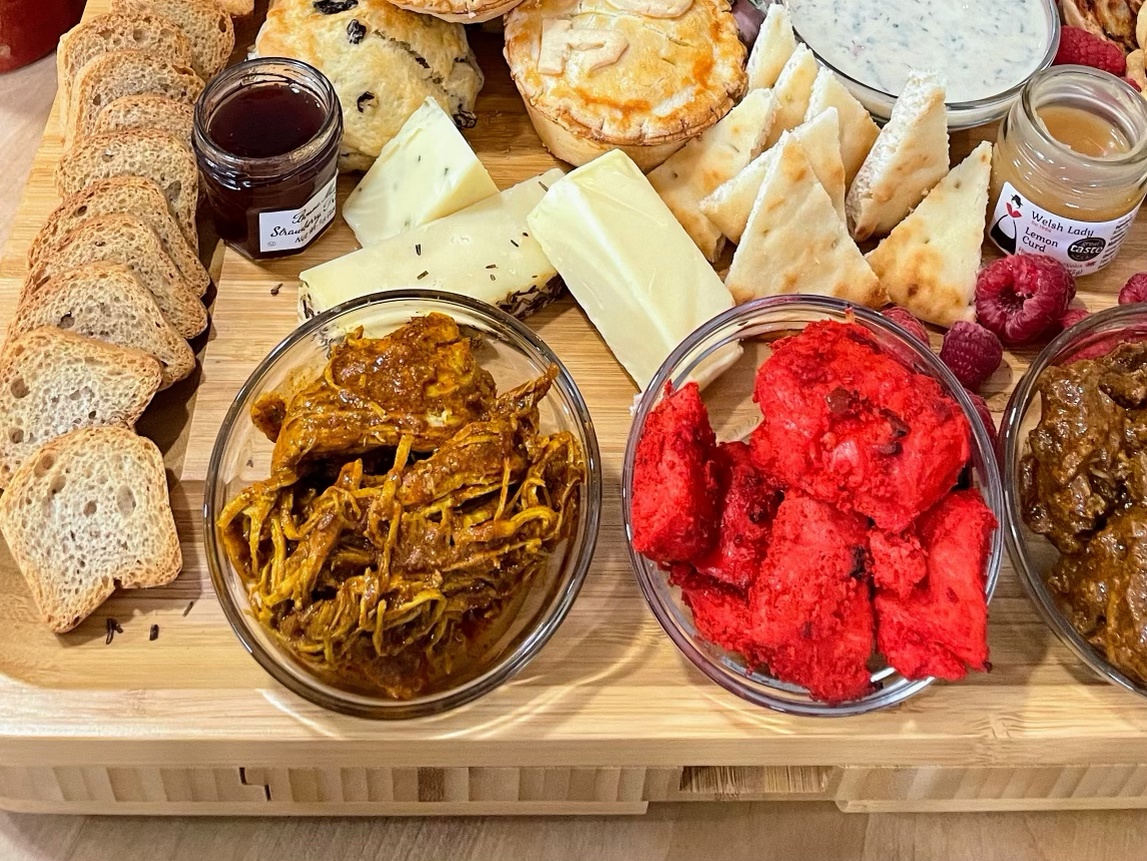
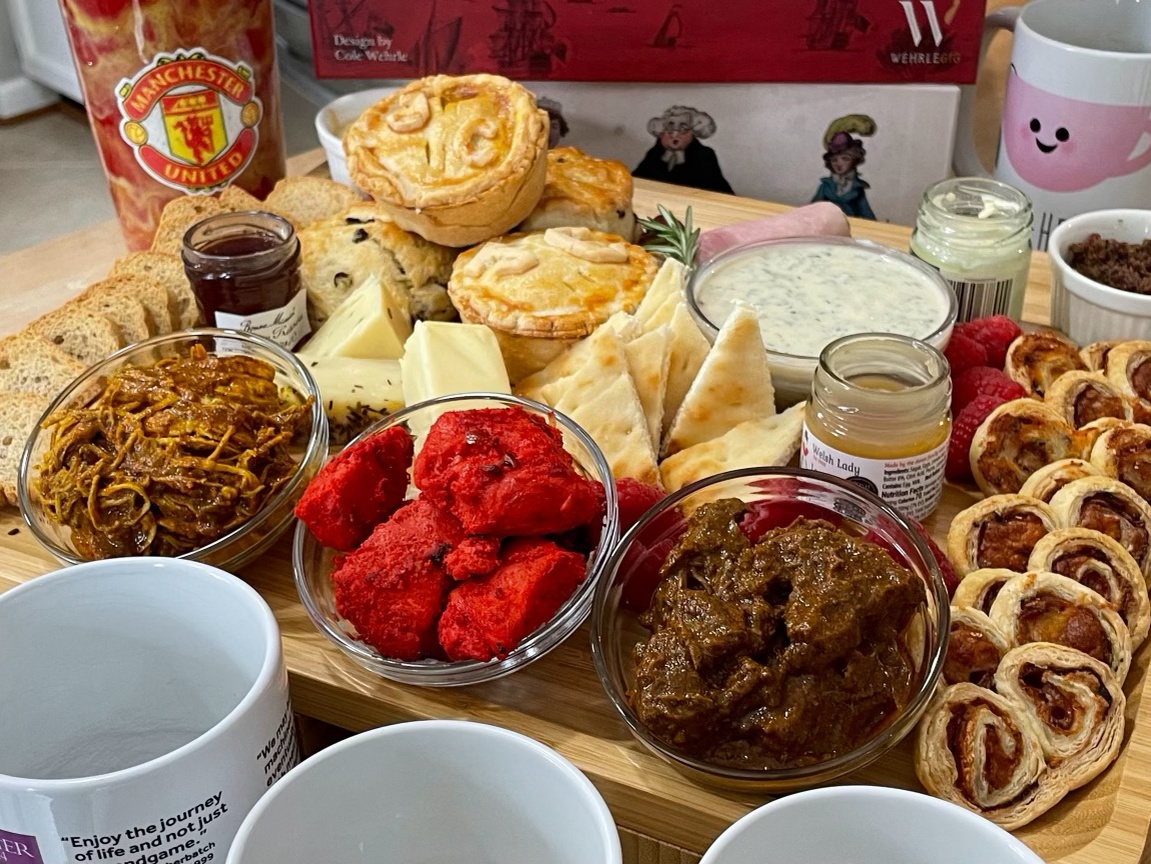
    Welcome everyone to the Hungry Meeple Episode One with featured game John Company! For the main course we discuss our John Company 1710 playthrough that we paired with delicious Chicken Curry Mini Pies, Chicken Tikka Masala Curry, Tandoori Chicken Starter and Beef Madras Curry. In addition we have a bountiful serving of appetizer games you can share with your friends and family including the kiddos. The table is set, so sit back, relax and enjoy!

  • Chicken Curry Mini Pies

    Chicken Curry Mini Pies

    by Zaida Marrero

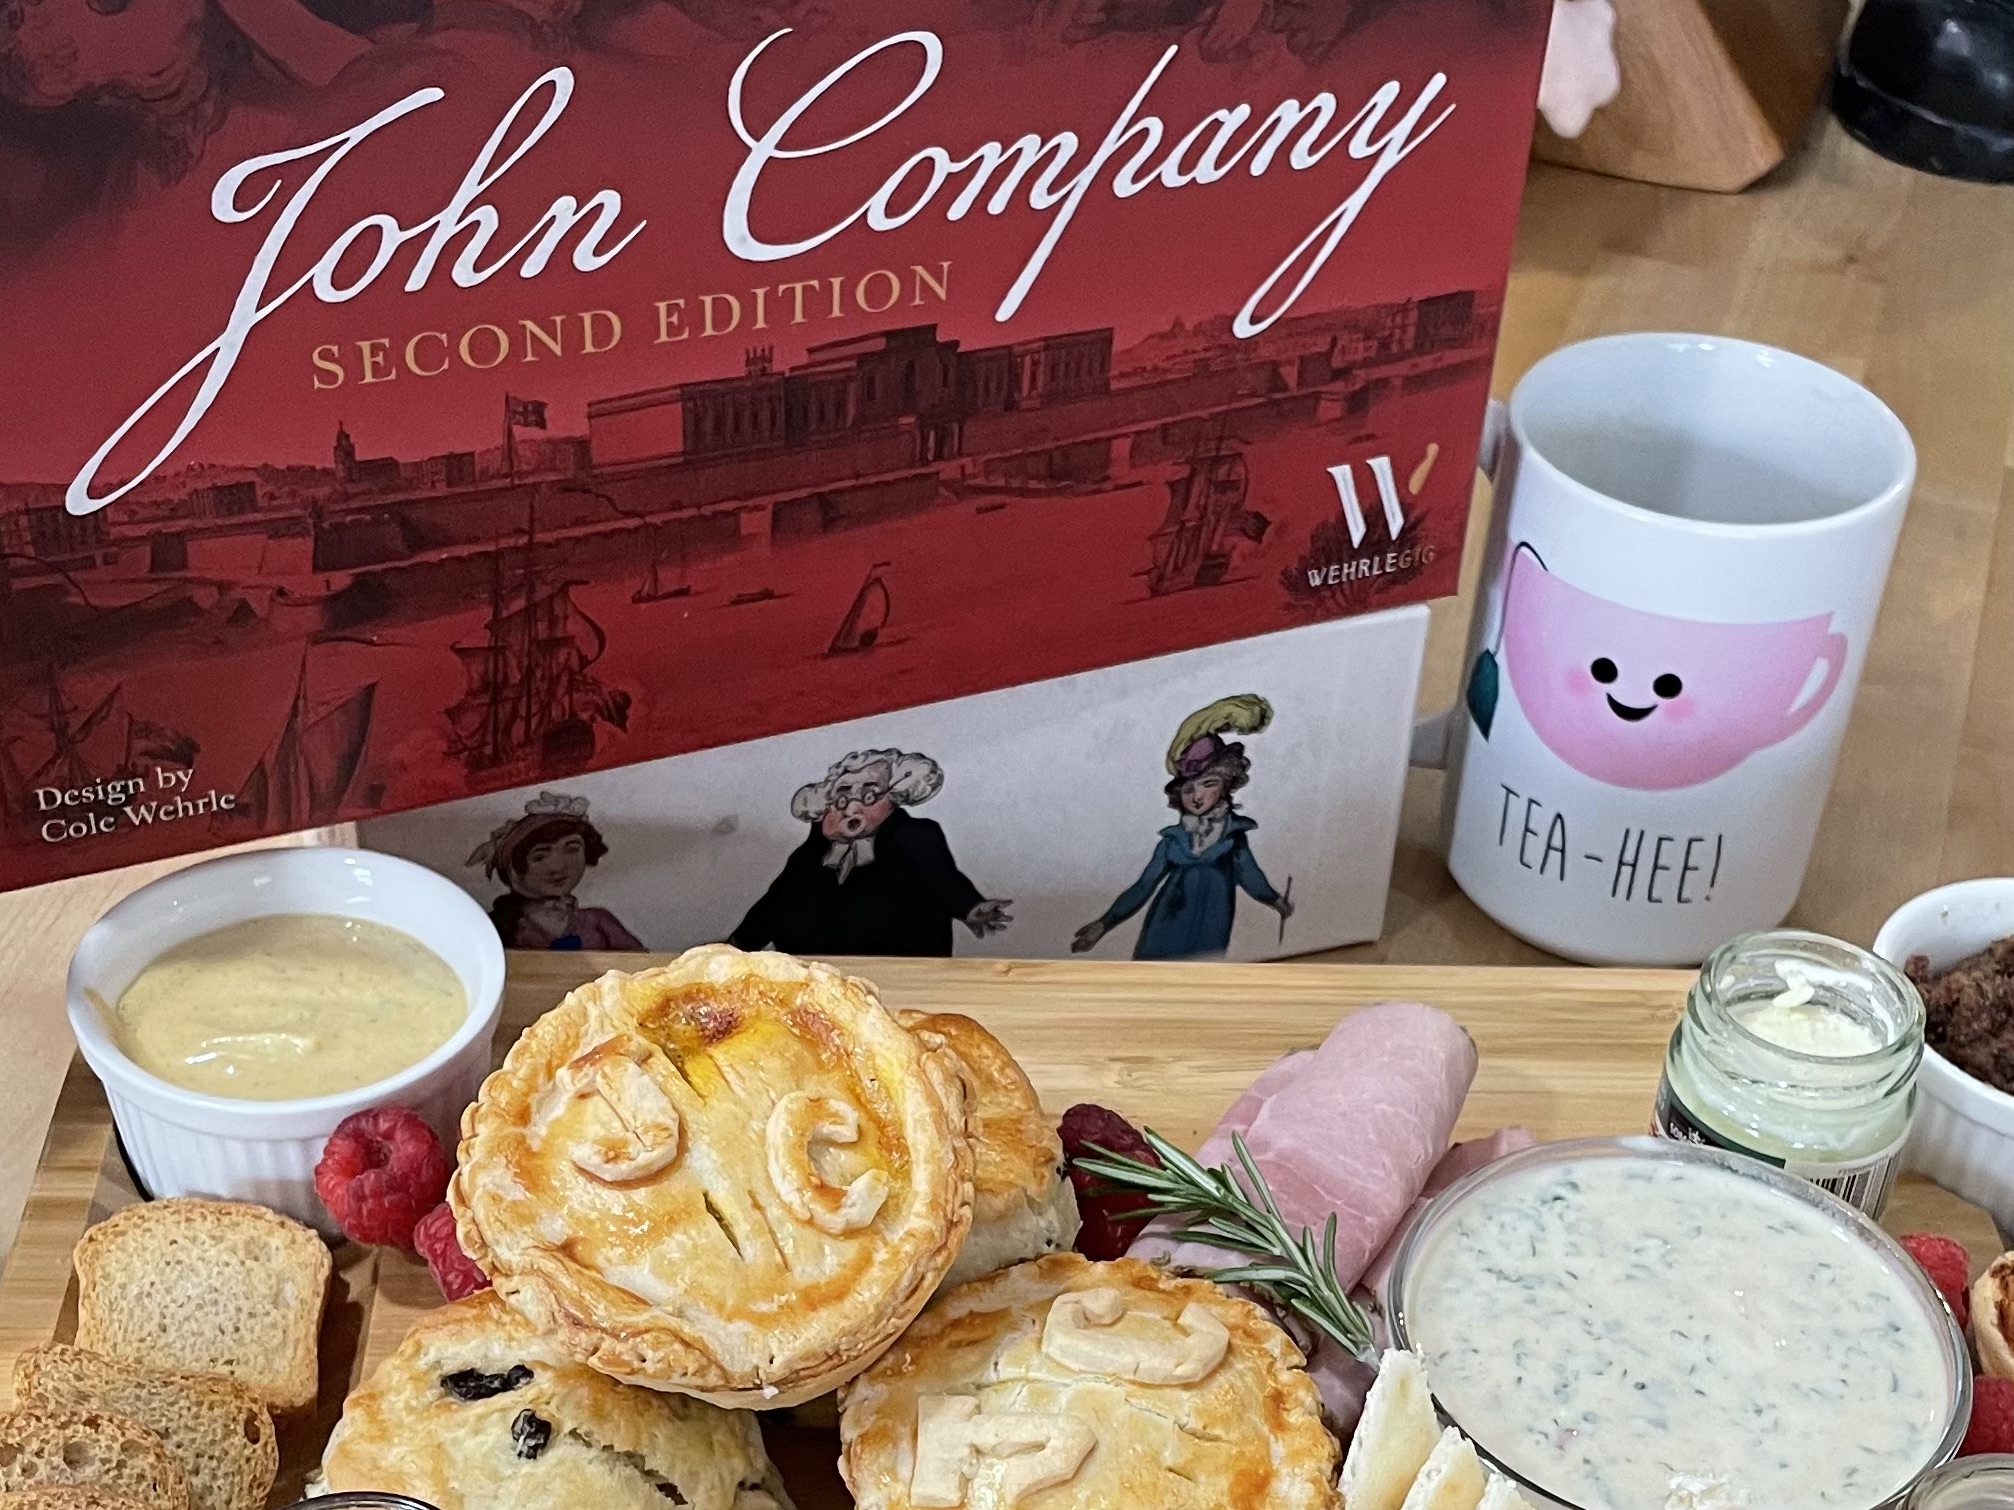
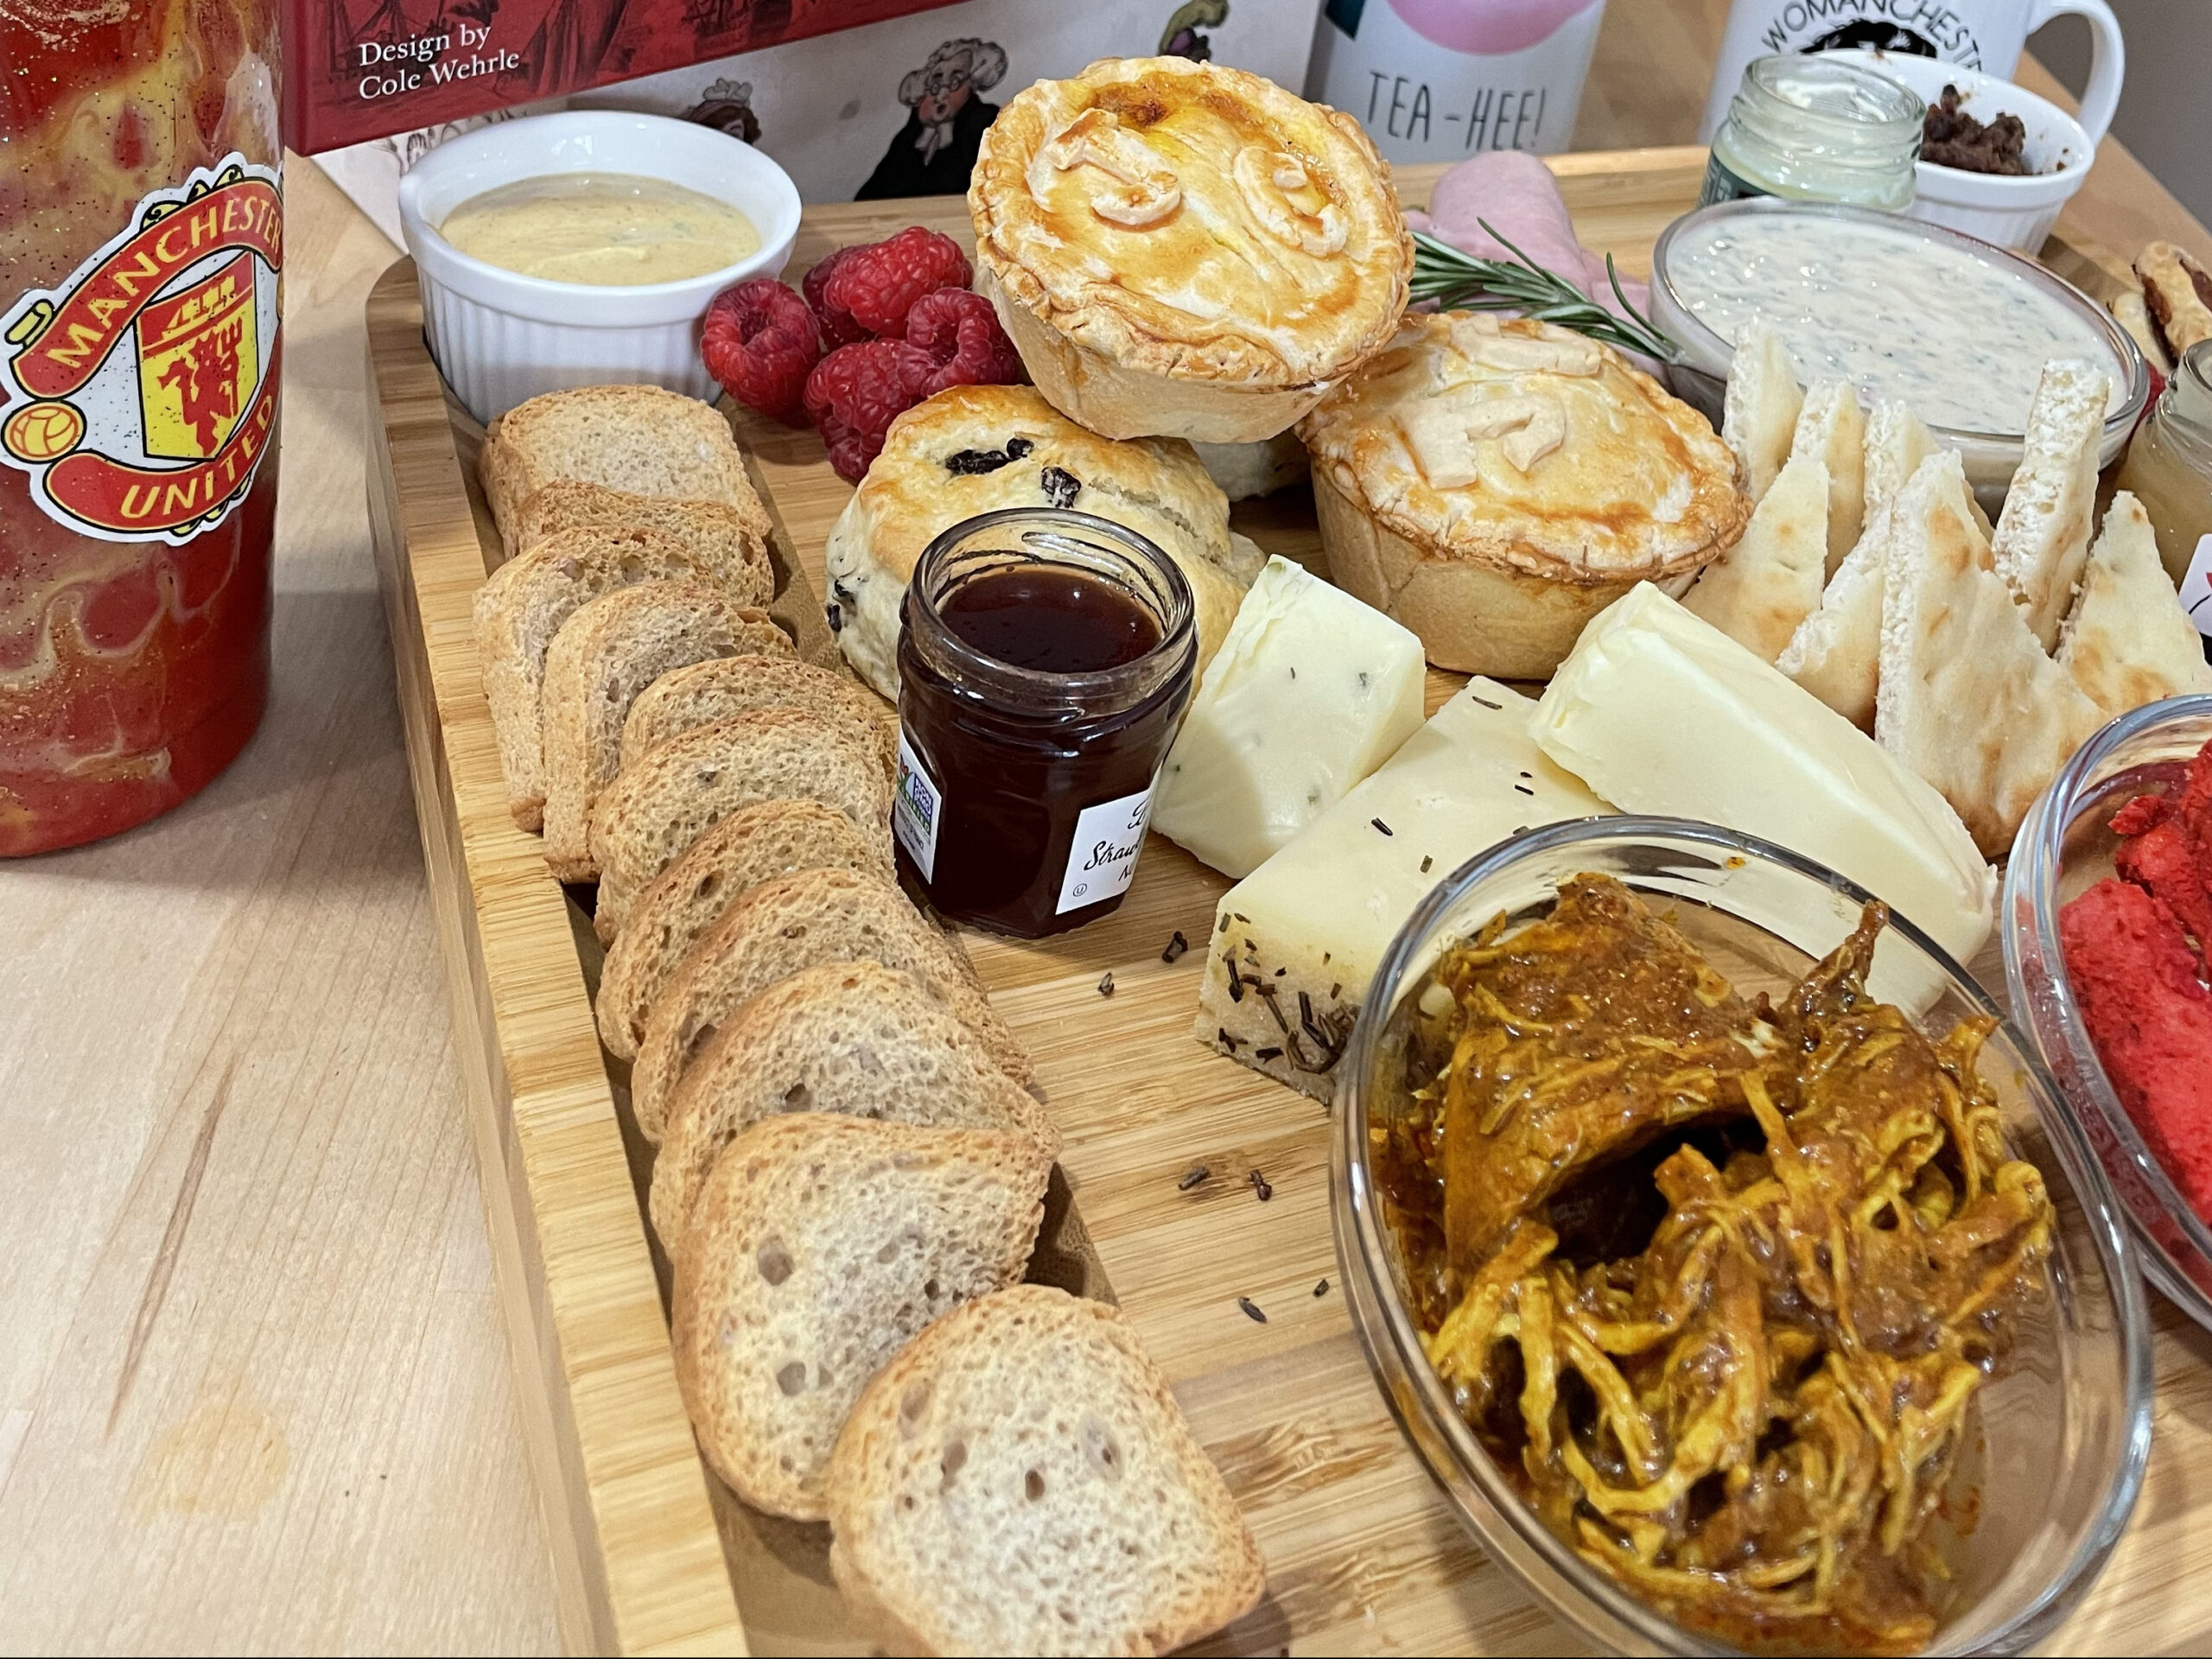
    If you listened to us in our podcast or found us randomly online, this post is about how the John Company game inspired us to develop recipes for our board game dinner party. The history was great, the setting was excellent, the food was incredible, and the gaming afterwards was amazing! Here is how I got inspired.

    The John Company board game is about the British East India Company, which was a  joint-stock company founded to trade with India to Britain’s advantage. The John Company board game begins in the early eighteenth-century, when the Company has a weak foothold on the subcontinent. 

    Brittain has always been a trading nation, since before John Company’s time. Wealthy people were able to cook with spices imported from abroad by common trade routes at the time. However, Spices were luxury items exclusively for the wealthy as poor people could not afford them.

    The time setting of John Company encompasses the Georgian Era in Britain’s history. Food during the Georgian Era was characterized by the consumption of cheese, bacon, beer, bread, muffins, butter and cream, honey, fruit jams, pudding, and pie (both savory and sweet), cheesecake, tarts and custards. The sandwich was first introduced by Lord Sandwich, and other meats and poultry were eaten like pigeon, beef, chicken, turkey, geese, mutton among others.

    The Johns Company trading made access easier to commodities like sugar, tea, coffee, tobacco, spices among others, to the English people, and what was a luxury item to a few before became an essential item to most. Now even poor people could afford tea and sugar. People of the time learned to use spices and adapted Indian dishes brought back to Brittain, to their tastes. A love for curry and other spicy food was born and to this day spices are an intrinsic part of English Cuisine. 

    Nat was incredible enough to provide us with her home recipes for chicken tikka and beef madras that can be accessed on this link!

    Feeling fascinated by all this information about food from the Georgian Era, I decided to focus on pies and curry. Pies are a clean way to eat a meal. Further research into pies indicated that the history of pies goes back to the time of the ancient Egyptians and ancient Greece, where open shells of pastry filled with savory fillings were eaten by the people of the time. However, it is believed that the Romans were the firsts to create a filled pie with bottom and top crusts, and that the Romans were the ones that brought pies to Brittain. At some point in history pies were used as tupperware to protect the food inside and keep it fresh. Pies were fun and entertaining. Elaborated pies were served as a wow factor for royalty and upper class members. The nobility wanted to impress their guests and it is believed they would even order their cooks  to create pies with living animals inside for the sake of entertainment. Imagine that! What a surprise!

    I am more than convinced that mini pies are perfect for board game parties and a pie filled with curry would be an explosion in your mouth that will motivate you even further to want to play John Company. 

    Recipes


    serves 9 mini pies (approximately)

    time 2 hours

    episode John Company

    Equipment


    • 4 inch and 3 inch round cutters
    • 12 holes muffin tray, greased
    • 10-12 inches deep nonstick pan

    Ingredients


    • 4 boneless/skinless chicken thighs
    • salt and pepper
    • olive oil 
    • 1 onion, finely chopped
    • 1-2 jalapeño or serrano chiles (Ribs and seed removed to lower heat intensity), finely chopped
    • 2 tablespoons curry powder
    • 2 tsp garam masala
    • 3 medium garlic cloves, minced or pressed
    • 1 tablespoon fresh ginger, grated 
    • 1 tablespoon tomato paste
    • 1-2 potatoes, peeled and cut into pieces (about 1-2 cups)
    • 1 cup chicken broth + 1/2 cup water
    • 1 tablespoon cilantro (optional)
    • 2 packages store bought pie dough (or home made pie dough)
    • 1 large egg, lightly beaten 

    Instructions


    1. Pat chicken dry with paper towels then season it with salt and pepper. Place the chicken in a bowl cover it at let it rest in the refrigerator for at least 30 minutes if you can. 
    2. Heat the oil in a deep nonstick pan over medium heat. Sear the chicken in the pan and cook for about 3 minutes until skin has browned. Flip chicken and repeat on other side. Transfer chicken to plated let it rest. 
    3. Pour off fat from skillet or put more oil if needed. Heat fat over medium heat until shimmering. Add onions, chiles, a pinch of salt and cook until beginning to brown, about 5 minutes, stirring occasionally. 
    4. Clear the center of the pan and add about a tablespoon of oil, add curry spices and garam masala; cook stirring constantly until fragrant, about 1 minute. Add garlic, ginger and tomato paste; cook stirring constantly until fragrant, about 1 minute longer. Add potatoes and cook, stirring constantly, until spices coat the potato pieces, about 2 minutes longer.
    5. Return the chicken thighs and stir to coat in the spice mixture, then add chicken stock and water. Increase heat to medium-high and bring mixture to boil, scraping bottom of pan and adjusting liquid consistency as needed. Reduce the heat, cover with a lid and simmer for 20 mins, until chicken is cooked through and there is no sign of pink meat or until until chicken registers at least 185 degrees. Remove the chicken from the pan and shred it or chopped.
    6. Return pan to high heat and bring to boil. Cook until sauce is thick enough to coat back of spoon and potatoes are completely tender, about 7 minutes. 
    7. Remove pan from heat, return chicken to sauce. Stir in cilantro, and season with salt to adjust the seasoning to your taste. Leave the filing to cool completely.
    8. Remove the pastry from the fridge and leave to soften for around 10 minutes.
    9. Adjust oven rack to middle position and heat oven to 400 degrees. 
    10. Roll 1-2 dough rounds into a 12 inch circle on lightly floured counter. Using the 4-inch cutter, stamp out rounds. Press  each round into muffin tray hollows, making sure to have an even thickness.
    11. Divide the filling among the pastry bottoms on the muffing tins. 
    12. Roll 1-2 dough rounds into a 12 inch circle on lightly floured counter. Using the 3-inch cutter, stamp rounds and use a skewer or sharp knife to pierce a whole in each 3-inch round to allow stem to escape. Press  each round into muffin tray hollows, making sure to have an even thickness.
    13. Brush the edges of the pastry with beaten egg. Place a 3-inch round on each pie as a lid and press the edges together to seal. Trim any unwanted dough and use leftover dough to cut decorations if desired. Glue the decorations to each pie with beaten egg making sure not to cover the holes. Brush the tops with remaining beaten egg and chill for 20 mins.
    14. Bake the pies for 30 mins,  or until crisp and golden. Serve hot or cold with curry-chop (recipe below) or yogurt.

    Curry-chup


    makes about 1/2 a cup

    time 15 minutes

    episode John Company

    Equipment


    • Nice looking bowl
    • Small skillet

    Ingredients


    • 2 teaspoon of curry powder
    • 1/4 cup mayonnaise
    • 1/4 cup plain yogurt 
    • 3 tablespoon ketchup
    • 1 teaspoon lemon juice
    • 1 small garlic clove (minced or pressed)
    • 1 teaspoon chopped cilantro
    • Salt and pepper to taste

    Instructions


    1. Toast curry powder in small skillet over medium-high heat, stirring constantly, until spices are fragrant, about 1 minute. Remove from the heat and set aside to cool.
    2. Whisk all ingredients together.
    3. Serve in bowl.

    Notes!


    One of the things I love about this recipe is that you can easily adapt it to your tastes, here are some suggestions:

    • You can make your favorite curry recipe to fill the mini pies but I will suggest adding potatoes. The potatoes will prevent a soggy bottom by absorbing extra liquid when the mini pies are baked in the oven. 
    • If you like spicy hot food, use serrano or jalapeno peppers with ribs and seeds. If you like less spicy food, remove the seeds or even use sweet peppers.
    • If you are vegetarian, omit the chicken then add veggies like cauliflower, peas and veggie broth.
    • The curry-chop is used to increase the spice flavor and the yogurt is used to tame the heat. 

    I can’t wait for you to try it and adapt it to your taste. If you do, leave your comments below.

  • Chicken Tikka Masala Curry

    Chicken Tikka Masala Curry

    By Natalie Curran

    This is a recipe handed down to me from my mum, made easier for those game nights…

    Recipe


    Prep time: 10 mins (overnight marinade if possible)

    Cook time: 3-4 hours (oven/stove)

    Ingredients


    • Chicken breast (4 large medium to large)
    • Chicken stock (2 cubes/sachets)
    • Garlic powder/fresh garlic (4 tbsp)
    • Black pepper (4 tbsp)
    • Curry powder (4 tbsp)
    • Tandoori powder (4 tbsp)
    • Chili powder (2 tbsp)
    • Garam masala (4 tbsp)
    • Turmeric (roughly cover chicken)
    • Cumin (2 tbsp)
    • Yogurt (5 tbsp)

    Optional:

    Adding a tomato pasta/sauce/paste – provides the richer tomato taste.

    If you can’t get all the ingredients or want more sauce PATAKS range of sauce are amazing. For this dish I would use the Tikka Masala PASTE (or sauce if you want a thinner curry). You can usually get these sauces in a Safeway or Giant in the International foods isle.

    Instructions


    1. Pre-heat oven to 400.
    2. Add the Chicken breast to an oven dish (something like a Pyrex which can hold water to cover the chicken)
    3. Roughly cover the chicken with the turmeric.
    4. Add the stock, black pepper, garlic, curry powder, garam masala, cumin, and chili powder to the chicken. The cover with water and foil.
    5. Place the dish in the oven and cook for 3-4 hours, checking on it periodically to stir. I leave until the chicken starts to fully break apart (this way when the curry’s made you get the perfect amount of sauce to chicken). The water may need to be topped up every so often, but as the cooking time nears the end you want to reduce the amount of water in the dish.
    6. Once the cook time is nearly through, there should be a layer of flavorful water left. Here is where you make the decision to make the paste yourself or add the PATAKS sauce to the dish.
      1. If using PATAKS Chicken Tikka Masala, add 1-2 jars of paste at this time, thoroughly mix and leave to cook for another 20 mins.
      2. If making the past from scratch. Triple the amount of tandoori powder, cumin, garam masala, curry powder, chili powder and add to a pan with 2 tbsp of oil. Mix well on a low heat. Add some tomato sauce (pasta sauce). Reduce the water in the chicken further and then add to pan. Cook for 20 mins stirring constantly.
    7. For the thicker, creamier taste add the yogurt here to finish off.
    8. Serve with naan bread and rice.
  • Tandoori Chicken Starter

    Tandoori Chicken Starter

    By Natalie Curran

    Something that I’ve grown up with living in the UK is the common phrase ‘Wanna go for a curry?’ This is as common to me as people may associate fish and chips with the Brits.  In Manchester there’s a road called the curry mile, which is lined with restaurants that serve it and it’s something that many British folks cook for their families.  It’s something that is a part of me and that I have and will continue to share with friends and family alike.  One of our favorite things to order first in any Indian restaurant is the chicken starters, which was the main choice of starter for our John Company board game adventure:

    Recipe


    Prep time: 10 mins (overnight marinade if possible)

    Cook time: 30-40 mins (oven/stove)

    Ingredients


    • Diced chicken breast (600-800g, or 2 medium to large chicken breast, keep the pieces roughly the same size)
    • Tandoori powder (2 tbsp)
    • Chili powder (1 tsp)
    • Minced garlic (1 tsp)
    • Natural yogurt (1/2 pot)
    • Lemon juice (1 tbsp)
    • Olive oil (2 tbsp)

    And for the color you will need red food coloring (plus yellow/orange – to get that bright tandoori color)
    I generally start with these ingredients and add more as I taste the coating. I don’t generally cook with salt or minced ginger (as I don’t like it) but traditional recipes will usually include a tsp or so of these.

    Instructions


    1. If working with chicken breast, dice them into cubes that are roughly the same size.
    2. In a separate bowl, mix the ½ pot of yoghurt with the garlic, chili powder, lemon juice, oil, and of course the tandoori powder. 
    3. Add the red food color (and yellow/orange) until you get the desired color. I start of small with 1-2 tsp.
    4. Taste the marinade, this is the point I decide if I want more spice or garlic, but you should already be feeling that tandoori taste. Season until your hearts content.
    5. Now add the diced chicken to the marinade. Ensure each cube is covered and leave to marinate for as long as possible – overnight in the fridge works the best.
    6. Cooking: these can be done on the stove or in the oven. I prefer the oven (at 375), the chicken can be skewered or put in a dish (I use a pyrex dish, but most oven dishes will work). DON’T WASTE THE MARINADE –cover the chickens with any leftover sauce. Cook until the chickens start to brown and even burn on the edges (true tandoori style). This should be 20-40 mins depending on your oven and liking.

    The tandoori chicken isn’t finished without that mint yogurt sauce to dip it in…


    Mint Yogurt Sauce

    Prep time: 20 mins (picking the mint and coriander is what takes the time here)

    Ingredients


    • Fresh Mint (a handful, usually a small mint plant from the store will cover this)
    • Fresh Coriander (another handful)
    • Cumin powder (1 tbsp)
    • Green chili (1)
    • Yogurt (1/4 pot)
    • Salt (1 tsp)
    • Sugar (1 tsp)
    • Lime/lemon (1 tsp)

    Instructions


    1. Place the mint, coriander, salt, sugar, green chili, cumin, lemon juice in a blender. Blend until there is a smooth paste
    2. Place the yogurt in a bowl and add the smooth paste and mix well.
    3. Serve with tandoori chicken or any other starter of choice.
  • Beef Madras Curry

    Beef Madras Curry

    By Natalie Curran

    Recipe


    Prep time: 10 mins (overnight marinade if possible)

    Cook time: 3-4 hours (oven/stove)

    Ingredients


    • Diced beef (600-800 g)
    • Beef stock (2 cubes/sachets)
    • Garlic powder/fresh garlic (4 tbsp)
    • Black pepper (4 tbsp)
    • Curry powder (4 tbsp)
    • Tandoori powder (4 tbsp)
    • Chili powder (2 tbsp)
    • Madras powder (4 tbsp)
    • Turmeric (2 tbsp)
    • Cumin (2 tbsp)
    • Yogurt (5 tbsp)

    Optional:

    Adding a tomato pasta/sauce/paste – provides the richer tomato taste.

    If you can’t get all the ingredients or want more sauce PATAKS range of sauce are amazing. For this dish I would use the Hot Curry/Madras PASTE (or sauce if you want a thinner curry). You can usually get these sauces in a Safeway or Giant in the International foods isle.

    Instructions


    1. Pre-heat oven to 400.
    2. Add the diced beef to an oven dish (something like a Pyrex which can hold water to cover the chicken)
    3. Add the stock, black pepper, garlic, curry powder, madras powder, turmeric, cumin, and chili powder to the beef. The cover with water and foil.
    4. Place the dish in the oven and cook for 3-4 hours, checking on it periodically to stir. The water may need to be topped up every so often, but as the cooking time nears the end you want to reduce the amount of water in the dish.
    5. Once the cook time is nearly through, there should be a layer of flavorful water left. Here is where you make the decision to make the paste yourself or add the PATAKS sauce to the dish.
      1. If using PATAKS Hot madras, add 1-2 jars of paste at this time, thoroughly mix and leave to cook for another 20 mins.
      2. If making the past from scratch. Triple the amount of tandoori powder, cumin, hot madras, curry powder, chili powder and add to a pan with 2 tbsp of oil. Mix well on a low heat. Add some tomato sauce (pasta sauce). Reduce the water in the beef further and then add to pan. Cook for 20 mins stirring constantly.
    6. For the thicker, creamier taste add the yogurt here to finish off.
    7. Serve with naan bread and rice.